

How to Install Frameless Glass Balcony Balustrade Systems: A Step-by-Step Guide
Leave a message
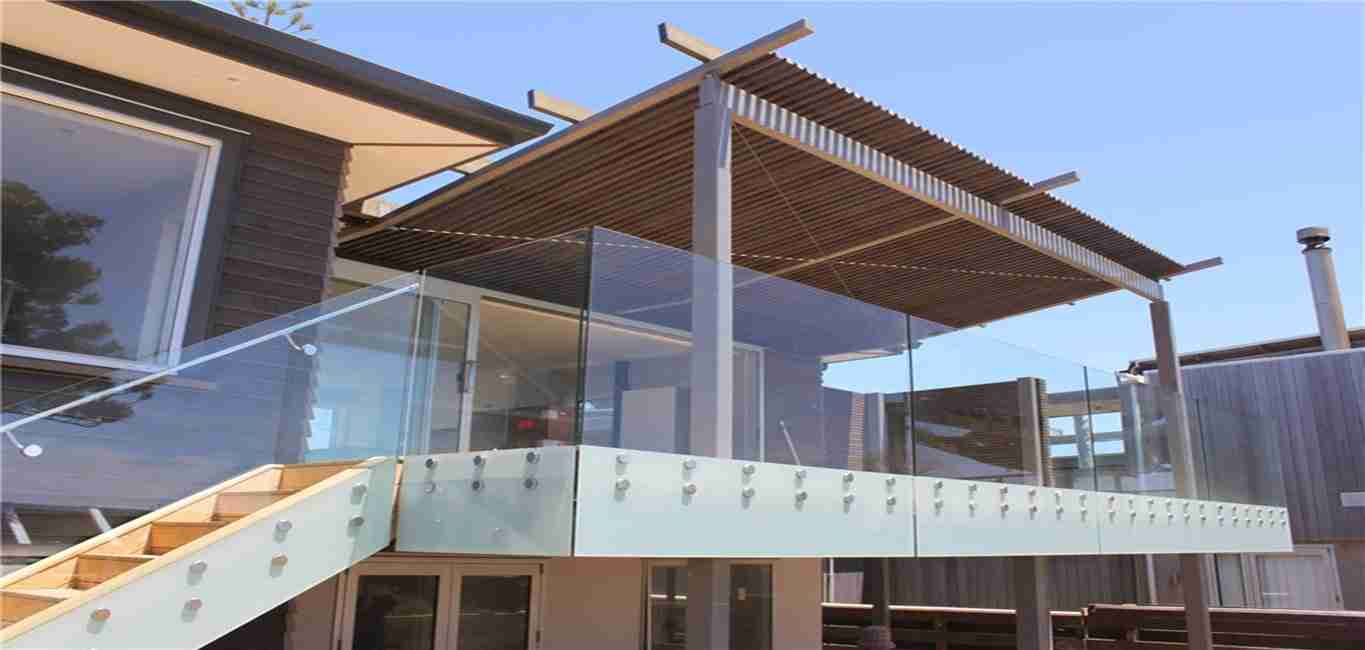
How to Install Frameless Glass Balcony Balustrade Systems: A Step-by-Step Guide
Introduction
Frameless glass balcony balustrade systems have gained immense popularity in contemporary architecture due to their sleek, minimalist design that offers unobstructed views and enhances the aesthetic appeal of buildings. These systems combine functionality and elegance, making them a preferred choice for modern balconies. Installing a frameless glass balcony balustrade requires precision, careful planning, and adherence to safety standards. This comprehensive guide will walk you through the step-by-step process of installing a frameless glass balcony balustrade system, from initial planning to final adjustments.
1. Understanding Frameless Glass Balcony Balustrade Systems
1.1 Components of Frameless Glass Balcony Balustrade Systems
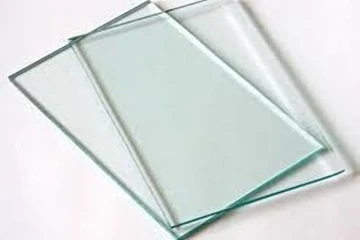
● Glass Panels: Typically made from tempered or laminated safety glass, designed to provide durability and safety.
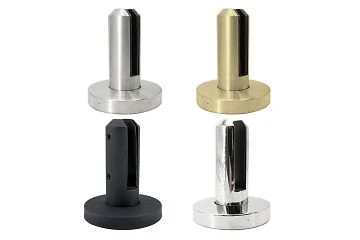
● Mounting Systems: Includes base shoes, spigots, clamps, or channels that securely hold the glass panels in place.
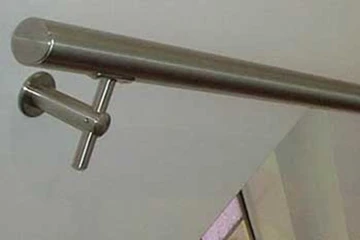
● Handrails (Optional): Can be added for additional safety and design enhancement.
● Hardware: Includes bolts, screws, anchors, and other fasteners required for secure installation.

1.2 Types of Mounting Systems
● Base Shoe Systems: Recessed or surface-mounted channels that support the bottom edge of the glass panels.

● Spigots: Vertical supports that hold the glass panels at intervals.

● Clamps and Brackets: Attach to the edges of the glass panels to provide additional support.

● Channel Systems: Recessed or surface-mounted channels that secure the glass panels along their edges.

1.3 Safety and Compliance Considerations
● Building Codes: Ensure compliance with local building regulations and safety standards.
● Glass Specifications: Use tempered or laminated glass to meet safety requirements.
● Load Testing: Confirm that the balustrade system can handle the required load and pressure.
2. Planning and Preparation
2.1 Site Assessment
● Measure the Balcony Area: Measure the length, height, and width of the balcony where the balustrade will be installed. Note any uneven areas or obstructions.
● Check for Level Surfaces: Ensure that the surfaces where the balustrade will be mounted are level and stable.
● Identify Potential Obstacles: Take note of any obstacles such as columns, corners, or uneven surfaces that may impact installation.
2.2 Selecting Materials
● Glass Panels: Choose the appropriate thickness and size for the glass panels based on the balcony dimensions and local building codes.
● Mounting System: Select a mounting system that fits the balcony design and desired aesthetic.
● Hardware: Ensure that all necessary hardware components are included in your purchase.
2.3 Tools and Equipment
● Measuring Tape: For accurate measurements.
● Level: To ensure that all components are installed level.
● Drill: For creating holes in the balcony surface.
● Screwdriver: For securing screws and bolts.
● Rubber Mallet: For positioning glass panels without causing damage.
● Sealant and Adhesive: For securing and sealing joints.
● Safety Gear: Gloves, goggles, and other protective equipment.
3. Preparing for Installation
3.1 Marking the Installation Area
● Measure and Mark: Use a measuring tape and chalk to mark the installation locations for the base shoes, spigots, clamps, or channels.
● Align the Marks: Ensure that the marks are aligned with the balcony's edge and any other relevant features.
3.2 Preparing the Balcony Surface
● Clean the Surface: Ensure that the balcony surface where the base shoes, spigots, or channels will be mounted is clean and free of debris.
● Check for Stability: Verify that the balcony surface is stable and capable of supporting the balustrade system.
4. Installing Base Shoe Systems

4.1 Recessed Base Shoes
Step 1: Mark the Recess Area
Measure and Mark: Use a measuring tape and chalk to mark the area for the recess where the base shoe will be installed.
Step 2: Cut the Recess
Cut the Balcony Surface: Use a saw or specialized cutting tool to create a recess in the balcony surface according to the marked lines.
Clean the Recess: Remove debris and clean the recess thoroughly.
Step 3: Install the Base Shoe
Position the Base Shoe: Place the base shoe into the recess.
Secure the Base Shoe: Use bolts and anchors to secure the base shoe to the balcony surface. Ensure that it is level and aligned.
Step 4: Insert the Glass Panels
Apply Sealant: Apply sealant inside the base shoe to prevent water ingress and ensure a secure fit.
Position the Glass Panels: Carefully insert the glass panels into the base shoe.
Adjust and Secure: Use a rubber mallet to adjust the position of the glass panels. Ensure they are level and secure.
4.2 Surface-Mounted Base Shoes

Step 1: Mark the Installation Area
Measure and Mark: Use a measuring tape and chalk to mark the installation area for the surface-mounted base shoe.
Step 2: Drill Holes
Drill Holes: Use a drill to create holes in the balcony surface according to the marked positions.
Step 3: Install the Base Shoe
Position the Base Shoe: Place the base shoe on the balcony surface, aligning it with the drilled holes.
Secure the Base Shoe: Use bolts and anchors to secure the base shoe to the balcony. Ensure that it is level and aligned.
Step 4: Insert the Glass Panels
Apply Sealant: Apply sealant inside the base shoe.
Position the Glass Panels: Insert the glass panels into the base shoe.
Adjust and Secure: Use a rubber mallet to gently adjust the panels. Ensure they are securely positioned.
5. Installing Spigot Systems

5.1 Positioning the Spigots
Step 1: Mark the Installation Area
Measure and Mark: Use a measuring tape and chalk to mark the positions of the spigots along the balcony edge.
Step 2: Drill Holes
Drill Holes: Drill holes in the balcony surface according to the marked positions.
5.2 Installing the Spigots
Step 1: Position the Spigots
Align the Spigots: Place the spigots into the drilled holes.
Secure the Spigots: Use bolts and anchors to secure the spigots to the balcony. Ensure they are level and properly aligned.
5.3 Installing the Glass Panels
Step 1: Apply Sealant
Apply Sealant: Apply sealant on the edges of the glass panels where they will contact the spigots.
Step 2: Position the Glass Panels
Insert the Glass Panels: Carefully place the glass panels into the spigots.
Adjust and Secure: Use a rubber mallet to adjust the panels. Tighten the spigot clamps to secure the glass panels in place.
6. Installing Clamps and Brackets

6.1 Positioning the Clamps and Brackets
Step 1: Mark the Installation Area
Measure and Mark: Use a measuring tape and chalk to mark the positions for the clamps or brackets along the balcony edge.
Step 2: Drill Holes
Drill Holes: Drill holes in the balcony surface according to the marked positions.
6.2 Installing the Clamps and Brackets
Step 1: Position the Clamps or Brackets
Align the Clamps or Brackets: Place the clamps or brackets in the drilled holes.
Secure the Clamps or Brackets: Use bolts and anchors to secure the clamps or brackets to the balcony. Ensure they are level and aligned.
6.3 Installing the Glass Panels
Step 1: Apply Sealant
Apply Sealant: Apply sealant on the edges of the glass panels where they will contact the clamps or brackets.
Step 2: Position the Glass Panels
Insert the Glass Panels: Place the glass panels into the clamps or brackets.
Adjust and Secure: Use a rubber mallet to adjust the panels. Tighten the clamp screws or bracket fasteners to secure the panels.
7. Installing Channel Systems

7.1 Recessed Channels
Step 1: Mark the Installation Area
Measure and Mark: Use a measuring tape and chalk to mark the area for the recessed channel.
Step 2: Cut the Recess
Cut the Balcony Surface: Use a saw to cut a recess in the balcony surface according to the marked lines.
Clean the Recess: Remove debris and clean the recess.
Step 3: Install the Channel
Position the Channel: Place the channel into the recess.
Secure the Channel: Use bolts and anchors to secure the channel. Ensure it is level and properly aligned.
7.2 Surface-Mounted Channels
Step 1: Mark the Installation Area
Measure and Mark: Use a measuring tape and chalk to mark the area for the surface-mounted channel.
Step 2: Drill Holes
Drill Holes: Drill holes in the balcony surface according to the marked positions.
Step 3: Install the Channel
Position the Channel: Place the channel on the balcony surface.
Secure the Channel: Use bolts and anchors to secure the channel. Ensure it is level and aligned.
7.3 Installing the Glass Panels
Step 1: Apply Sealant
Apply Sealant: Apply sealant inside the channel.
Step 2: Position the Glass Panels
Insert the Glass Panels: Carefully place the glass panels into the channel.
Adjust and Secure: Use a rubber mallet to adjust the panels. Ensure they are securely positioned.
8. Installing Handrails (Optional)

8.1 Selecting Handrails
Material: Choose handrails made from materials such as stainless steel, wood, or glass
.
Style: Select a style that complements the frameless glass balustrade system.
8.2 Mounting Handrails
Step 1: Mark the Installation Area
Measure and Mark: Use a measuring tape and chalk to mark the positions for the handrail brackets.
Step 2: Drill Holes
Drill Holes: Drill holes in the glass panels or balcony surface according to the marked positions.
Step 3: Install the Handrail Brackets
Position the Brackets: Place the brackets on the glass panels or balcony.
Secure the Brackets: Use bolts and anchors to secure the brackets.
Step 4: Attach the Handrails
Position the Handrails: Place the handrails on the brackets.
Secure the Handrails: Use screws or clamps to secure the handrails in place.
9. Final Adjustments and Inspection
9.1 Checking Alignment
Level and Plumb: Use a level to ensure that all components are level and plumb.
Alignment: Ensure that all glass panels and handrails are properly aligned.
9.2 Tightening Fasteners
Tighten Screws and Bolts: Check and tighten all screws, bolts, and fasteners.
Check Stability: Ensure that all components are stable and secure.
9.3 Applying Sealant
Seal Joints: Apply sealant to all joints and edges.
Clean Excess Sealant: Wipe away any excess sealant with a clean cloth.
9.4 Cleaning the Glass
Clean the Glass Panels: Use a glass cleaner and a soft cloth to clean the glass panels.
Inspect for Scratches: Check for any scratches or damage on the glass panels.
10. Maintenance and Care
10.1 Regular Cleaning
Clean Glass Panels: Regularly clean the glass panels using a mild detergent and water.
Avoid Abrasive Cleaners: Do not use abrasive cleaners that could scratch the glass.
10.2 Periodic Inspections
Inspect for Damage: Periodically inspect the glass panels, mounting systems, and handrails for any signs of damage or wear.
Address Issues Promptly: Address any issues such as loose fasteners or damaged glass immediately.
10.3 Professional Maintenance
Professional Inspection: Consider having a professional inspect the balustrade system annually to ensure its integrity and safety.
11. Troubleshooting Common Issues
11.1 Misaligned Glass Panels
Check Installation: Verify that the glass panels and mounting systems are correctly aligned.
Adjust Position: Adjust the position of the glass panels as needed.
11.2 Loose Fasteners
Tighten Fasteners: Ensure that all screws, bolts, and anchors are securely tightened.
Check Stability: Confirm that all components are stable and properly fastened.
11.3 Glass Panels Not Fitting
Measure Accurately: Verify that the glass panels are the correct size and shape.
Adjust Mounting Systems: Make necessary adjustments to the mounting systems to accommodate the glass panels.
Installing a frameless glass balcony balustrade system requires meticulous planning, precise execution, and attention to detail. By following this step-by-step guide, you can successfully install a frameless glass balustrade system that enhances the aesthetic appeal and functionality of your balcony. Ensure compliance with local building codes, use high-quality materials, and regularly maintain the system to enjoy a safe and stylish outdoor space. With the right tools, materials, and techniques, you can achieve a beautifully installed frameless glass balustrade system that complements your home's design and provides an unobstructed view.
If you are looking for a frameless glass railing, Please do not hesitate to contact us! A great discount for the first 10 people! Email: Zoey@fs-yongsheng.com


